Concrete Foundation for Garage: Simple Step-by-Step Guide
If you’re planning a new garage, the concrete foundation is the one part of the project you really can’t afford to rush or guess your way through. A properly poured garage slab is what keeps the structure level for decades. A bad one cracks, shifts, and causes problems that work their way up through every wall and door frame above it. Whether you’re figuring out how to make a concrete foundation from scratch or just want to understand what the process involves, this guide walks through the full process of how to build a garage foundation: from site prep to curing, with the specs that actually matter at each stage.
Table of Contents
Types of Concrete Garage Foundations
Not every situation calls for the same approach. Here’s a straight comparison of the most common options for a concrete garage foundation:
| Type | Best For | Durability | Cost |
| Monolithic slab | Small garages, mild climates | Good | Low |
| Floating concrete pad foundation | Most residential garages | Good | Low-Medium |
| Slab with perimeter footings | Larger garages, moderate frost | Very good | Medium |
| Block foundation with footer | Large garages, cold climates | Excellent | High |
For most prefab and site-built garages, a concrete slab for garage construction with perimeter footings is the standard choice. It handles load well, works across most soil types, and satisfies building requirements in the majority of US jurisdictions.
Before You Start: Permits and Garage Foundation Plans
Skipping this is the most common mistake in any DIY concrete pad for garage project. Most municipalities require a permit for any permanent structure, and the foundation often needs inspection at multiple stages before you can proceed.
What you’ll typically need:
- Zoning permit confirming the structure is allowed on your lot
- Building permit for the foundation and structure
- Garage foundation plans showing dimensions, depth, reinforcement, and drainage
- Soil inspection in some areas, especially on sloped or disturbed ground
Call your local building department before touching the ground. Some areas allow a simple monolithic pour. Others require footings that extend below the frost line. Find out which category you’re in before renting any equipment.
Step 1: Site Selection and Preparation
Pick the location carefully. Once the concrete is down, you’re committed.
What to check before breaking ground:
- Drainage: water should run away from the pad, not toward it. A site that pools after rain will cause long-term problems under any foundation type.
- Access: delivery vehicles and equipment need a clear path. Think about this before excavating.
- Soil condition: undisturbed native soil is ideal. Recently filled or disturbed ground settles unevenly and needs extra preparation.
- Underground utilities: call 811 before any digging to locate gas, water, and electrical lines.
Once the location is confirmed, clear the area completely. Remove grass, roots, topsoil, and any organic material. Organic matter compresses over time and causes the slab to shift unevenly.
Step 2: Layout and Excavation
Mark the exact perimeter using stakes and string lines. The garage floor foundation must match your building footprint exactly. If the concrete pad is larger than the garage, water collects along the edges and works its way under the walls.
Sizing rule that matters: the concrete pad foundation should be precisely the same dimensions as the garage. Not an inch larger.
For excavation:
- Dig down approximately 12 inches below your desired finished floor level
- Around the perimeter, dig an additional trench for the footing for garage walls, typically 12 inches wide and deep enough to reach below your local frost line
- In northern states, that trench commonly runs 36 to 48 inches below grade
- In warmer southern states, 12 to 18 inches is often sufficient
Frost depth is the number that drives footing depth on a concrete garage build. Footings above the frost line heave when the ground freezes, crack the slab, and shift everything above. Your local building department will give you the required depth for your county.
Use a laser level throughout excavation to confirm the base is flat. Uneven excavation leads to uneven slab thickness, which is where cracks start.
Step 3: Garage Footing
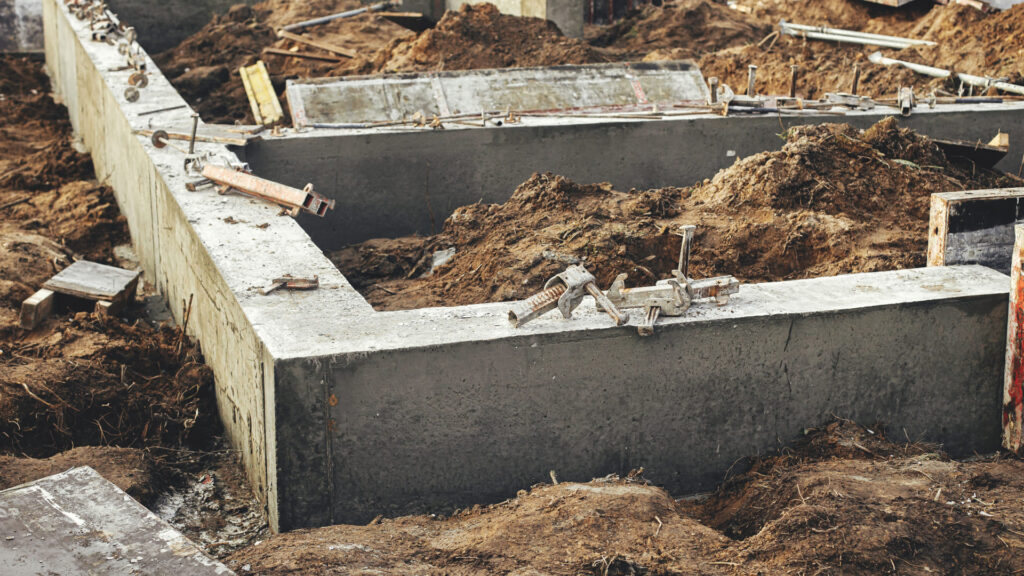
The footing for a garage is the concrete poured into the perimeter trench. It distributes the building’s load across a wider soil area and anchors everything against frost movement.
Standard garage slab detail for footings:
- Width: typically 2x the wall thickness (a 6-inch wall gets a 12-inch footing)
- Depth: at or below local frost line
- Thickness: minimum 8-10 inches of concrete
- Reinforcement: two continuous runs of #4 rebar around the perimeter
Set form boards along the trench walls to contain the pour. Make sure they’re level and staked securely. Pour the footing concrete and allow it to cure 24-48 hours minimum before building on top. Concrete footings for a garage foundation need to be fully set before the slab layer begins.
Step 4: Gravel Base
This step gets skipped more than it should. It matters more than most people expect.
Once footings are cured, fill the excavated interior with 4 to 6 inches of compacted gravel. Use clean crushed stone, 3/4 inch. Not river stone, not sand, not mixed fill. Crushed angular stone compacts tightly and drains. River stone stays loose and shifts over time.
Why gravel under cement pads matters:
- Prevents water accumulation directly beneath the concrete
- Acts as a capillary break, stopping moisture from wicking up through the slab
- Creates a stable, uniform base that won’t compress unevenly
- Adds a thermal buffer in freeze-thaw climates
Spread evenly and compact thoroughly with a plate compactor. Work from the outside in. Check level before moving on.
Step 5: Moisture Barrier and Reinforcement
Lay a 6 mil polyethylene vapor barrier over the compacted gravel. Overlap seams by at least 12 inches and run edges up the inside of the form boards. This is what stops ground moisture from wicking up through the concrete garage floor year after year.
On top of the barrier, install reinforcement. Two options depending on your situation:
- Wire mesh (6×6 W1.4): standard for residential garage concrete slabs, positioned in the middle third of the slab thickness
- Rebar grid (#3 or #4 at 18 inch spacing): used where soil conditions are poor or the garage will carry heavy loads like a vehicle lift or commercial equipment
Use plastic rebar chairs to hold the reinforcement off the vapor barrier. It needs to be centered in the slab when the concrete fills around it, not sitting on the bottom.
Step 6: Forms and Pre-Pour Checklist
Set perimeter form boards to the exact height of your desired finished floor. For a standard garage floor foundation, 4 inches of concrete is the minimum. Go 5 to 6 inches for heavy trucks, vehicle lifts, or softer soil conditions.
Before calling the concrete truck, check every item on this list:
- Forms are level, square, and staked solidly
- Gravel base is compacted and level throughout
- Vapor barrier is in place with no tears or gaps
- Reinforcement is elevated and correctly positioned
- Control joint locations are marked (every 8-10 feet to manage cracking)
- Anchor bolt positions are marked along the perimeter
Also: if any electrical conduit needs to run under the slab, now is the time. Running conduit after the pour means breaking concrete.
Step 7: How to Pour a Concrete Slab for a Garage
How to pour a garage slab cleanly comes down to preparation and pace. Have enough people on site. Once the truck starts, you work continuously until the pour is done.
Concrete mix specs:
- Strength: minimum 3,000 PSI, go to 3,500 PSI in cold climates or for heavy use
- Air entrainment: required in freeze-thaw climates for crack resistance
- Slump: 4-5 inches. More water means easier to work with and weaker concrete. Don’t add water to make the pour easier.
- Minimum thickness: 4 inches throughout the entire slab
Pour in sections from one end to the other. Use a screed board to strike the surface level with the forms. Follow with a bull float to close the surface and push aggregate down. For vehicle traffic, finish with a broom texture rather than a smooth trowel finish. Smooth concrete gets slippery when wet.
Install anchor bolts while the concrete is still workable, every 4 feet around the perimeter at the depth specified in your garage foundation plans.
Anyone planning to build a garage on a concrete slab should know that anchor bolt placement at this stage is what connects the structure to the foundation permanently. Get the spacing and embedment depth right the first time.
One thing that trips people up on how to pour concrete slab for garage projects: if the weather turns hot, windy, or both, the surface can start setting faster than expected. Have a plan for this before you start the pour, not during it.
Step 8: Curing
The most skipped step, and the one that determines whether the slab lasts 10 years or 40.
Concrete doesn’t dry. It cures through a chemical reaction that requires moisture. Cut that moisture off too early and the surface loses strength, develops cracks, and flakes over time.
Curing requirements:
- Keep the surface moist for a minimum of 7 days using curing compound, wet burlap, or plastic sheeting
- In hot or windy weather, start curing immediately after finishing. Surface moisture loss starts within hours.
- In cold weather below 40°F, use insulating blankets or heated enclosures to keep the slab above freezing
- Do not park vehicles or place heavy loads on the slab for at least 28 days. Full design strength develops at 28 days, not before.
A slab that cures correctly will last for decades. One that dries too fast shows surface cracks in the first season.
What Inspectors Check
For most permanent garage builds, expect inspections at these stages:
- Footing inspection before concrete is poured into the trench
- Reinforcement inspection before the slab pour
- Final inspection after curing is complete
Keep your garage foundation plans on site throughout the entire process. Inspectors verify that what was built matches what was permitted.
DIY or Hire Out?
Knowing how to pour a concrete floor for an existing garage or a new build is genuinely useful. But honest answer: a diy concrete pad for garage work is realistic only if you have concrete forming experience, access to a plate compactor and laser level, and enough people to manage a pour efficiently.
For most homeowners, the footing trenches and slab pour are worth hiring out. Site clearing and gravel prep are where DIY makes the most sense. Errors in the concrete work are permanent and expensive to correct.
Let Us Handle the Foundation
Rather not deal with any of this yourself? Storage Sheds and Garages handles foundation preparation as part of our process. We’ve coordinated hundreds of garage installs, we know what local inspectors require, and we make sure the concrete garage foundation is done correctly before the building goes up.
When you order through us, we take care of the full site prep: permits, excavation, gravel base, and concrete pour, all built to spec so there are no surprises on installation day.
Or call us at 717-874-8888 and we’ll walk through the right foundation approach for your lot, soil, and garage size.
Ready to Start Your Project?
"*" indicates required fields